Lauras Daily Madness

Monday, January 31, 2011

Give away #1 Bethany’s 5 Pigtail Hat!

CLOSED- Winner is comment #15- Lindsay!!!!

Our first give away is from Bethany’s 5. She creates adorable photo props, Halloween costume hats or just hats for your kids to wear around and be super cute anyway. You can find her on Facebook here.

Here are a few of my favs that she has created:

A lamb. Wow. I want that for Evie’s Easter pics pretty badly. Ok so this is what you guys can win!

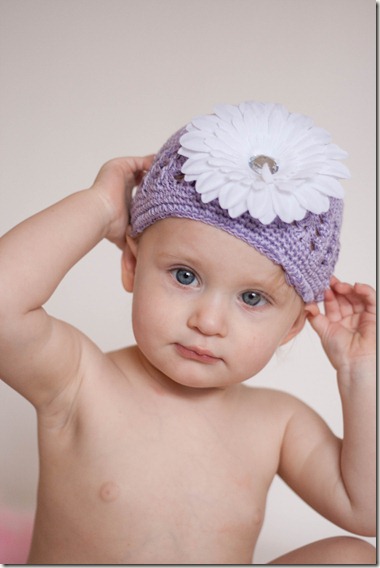
This is Bethany’s new pig tail hat. This is what she has to say about it. “I am calling this hat "pig tail fringe" in pink and red. It is a perfect photo prop with 4 different way s to get different looks. The hat can be used with no decorations or you can button on the INCLUDED items in different combos to get more looks. Button through the flower and then into any crochet hole with either side of the button showing or button on with out the flower for a more simple option. Please remember this hat has longer fringe strings and is intended for photo prop use only. Hat should always be used with adult supervision. Size Infant (15-16 inches around)

All right so if you want to win this adorable hat, there are several ways you can enter yourself into the drawing. Please leave a separate comment for each entry. I will be drawing winners Friday the 11th!

1. Leave a comment about your favorite hat of Bethany’s.

2. Go ‘like’ her on facebook here.

3. Follow my blog.

4. Subscribe to my blog.

5. Go add one of her items (or her entire shop) to your favorites here. Then post on what item you favorited.

5 chances to win per person! Good luck!

Countdown to V-Day begins! Come join the fun!

Valentine’s is one of my favorite holidays. Maybe its all the pink, I’m not really sure. Anyway to celebrate I pulled together a list of my favorite people to do some give aways, I have tons of do it yourself Valentine’s crafts to decorate with or give as gifts and I will also be posting facts about CHD (Congenital Heart Defect) because awareness week is coming up.

Did you know CHD is the #1 birth defect in newborns? I didn’t. But now I do. Right now I am hosting photography sessions to benefit a family affected by CHD. In fact they just lost their darling daughter to it after she spent her little life in the NICU. Every memory, every day being in the NICU. You can do something too! Sell heart cookies, knit up some heart dish cloths, create some heart soap. Its when we think that we are too small to make a difference that we are that small. If nothing else, go donate blood. Every CHD baby that has an open heart surgery needs it! You CAN make a difference.

Today’s give away is from Bethany’s 5. It is an adorable little hat. I will post it separately so I can link directly to each give away post everyday. So make sure you check it out here.

Ok on to the craft. First let me tell you that I am NOT crafty. I’d love to be but I am impatient and not detailed oriented so if it ends up looking good and I made it.. I GUARANTEE you can do it too. And this one turned out good so it’s a winner! Today we are going to make a ribbon Valentine wreath or center piece!

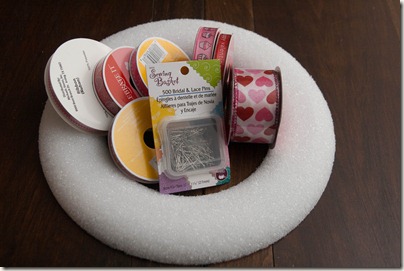
Here is your supply list:

IMG_0002-7

1 wreath

a large pack of straight pins

different ribbons- you need a total of about 45 yards of ribbon

Some pointers: I got a wreath with a flat back. Sounded ok until the pins poked through the back all the time. Go with a real round wreath. This one was 5.99 at Michael’s. You can buy that 3 pack for 7.99. Definitely worth it.

Splurge on 2 ribbon that are super thick. They may cost more but they take up a lot of space and make covering up the Styrofoam a lot easier. Go through your ribbon stock and see what white/pink/purple ribbon you already have that needs to be used up. Michael’s has ribbon 50% off this week also. This project would also be awesome for a scrapper or bow maker that is always finding themselves with extra ribbon. Just pin it on the wreath and create as you have scrap.

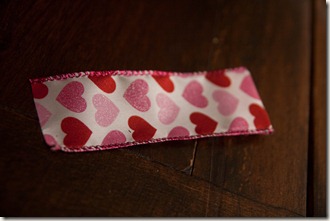
Ok step 1 is to cut your ribbon. They all need to be about 4 1/2 inches long. I just cut one and then used it to cut the rest.

IMG_0014-6

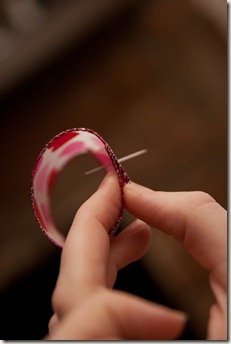
Step 2- Roll your ribbon where the two sides are overlapping and push a pin through to keep it together.

IMG_0017-7

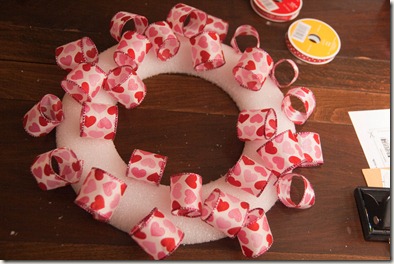
Push the pin onto your Styrofoam.

IMG_0019-7

It was easiest to start with the fatter ribbon because the skinnier ones are easier to find room for. I think its also best to do one type of ribbon at a time so you can sort of space them out. So that’s basically it! Continue with the rest of the ribbon and fill in all the Styrofoam. It helps to hold the wreath up directly in front of you sometimes to really see what its going to look like when hung.

IMG_0025-8

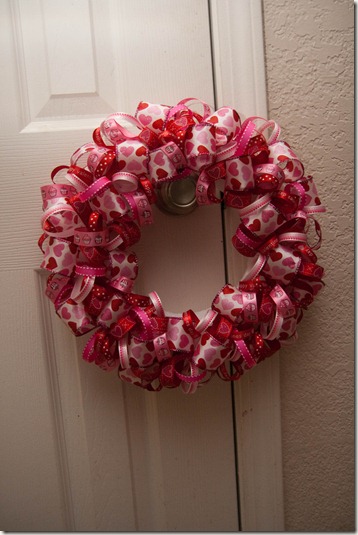
So here is my finished Valentine’s wreath. I think it turned out pretty cute! Another thing I’ve done with these is laid them flat on the table and put candle inside to create a centerpiece. This project does take about an hour but it can be a stress reliever as you get to poke things with needles. Also its repetitive and doesn’t require a whole lot of thought which is nice on days when your toddler screamed and cried about 80% of the day. All in all, I am very pleased with this project.

As I was poking away at the Styrofoam, my teacher brain tried to think of an easier and cheaper way to do this for toddlers, preschoolers or early elementary teachers. Pins and children under 12 don’t go well together. So this is the idea I came up with. I have not tried it so let me know if you do.

Supplies: 1 paper plate per child

8-10 pieces of red,pink, white construction paper per child

1-2 pieces of decorated Valentine scrapbook paper per child

Have the child (if old enough) make the paper plate into a wreath by cutting out the inside of the plate leaving just a ring. If you paper is 8.5x11, cut it down the center so you have 2 pieces that are almost 4.5 inches and then cut them into strips. Have child make circles with these and glue them together. Then glue them onto the wreath.

So there you go! First project done! Make sure you follow my blog so you don’t miss out on all the other crafts, give aways and fun happenings we’ve got going on around here to celebrate the big day!

Decorating with photos

I know a lot of people decide to do photography for the artistic aspect. I’d love to tell you how creative I am and how I just wanted to share that with the world but the truth is I went into photography because I wanted certain types of portraits of my children and the places I could afford weren’t getting them.  I have always had a camera for as long as I remember.  I loved photos and I loved taking photos but I’m not one of the artsy, mind blowing photographers of our days.  I’m just a mom with a camera.  Two years later, I’m a mom with a camera that takes pretty decent photos.  And I like them to not just live on my computer.

One of my soap boxes is to get your photos printed. You don’t want to print everything as a 16x20? Fine. Get one of those old timey albums and get some 4x6’s.  Back up your photos and put your cd’s in a fire proof safe or in a safety deposit box.  These memories cannot be replaced if something happened.  

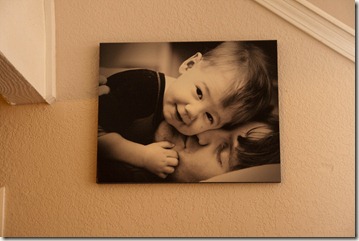
When we took Rett to get his newborn photos taken pre mom-with-a-camera, I had a 10x20 printed and it is on our stair well. It still sits along. I haven’t gotten anything else printed to go along with it but I WILL.  Anyway, I fell in love with that picture. I would look up at it and think about when he was that tiny and we all look so happy.  I love looking at it!  So I had more big prints done and I love looking at all of them too. When I think about the money that was spent, even I as a cheap skate will say its worth it.  All except one which I will go into in a minute. 

Options

When you are planning your attack on your walls one thing you have to consider is all the options.  You have size options, printing options, framing options, color options and by the time you’re done, the option to bang your head against the wall because you are so overwhelmed. Take a deep breath.  Its not that difficult.  If you are wanting to do some sort of artistic cluster on a long or large portion of your wall, cut apart a cardboard box in sizes you may want to use and arrange them on the wall to see how its going to look.  You can get ideas online from different retailers trying to sell you the entire collage.  Here is one site with ideas. Then just go order wherever has the best prices. 

When considering options, remember that some of the larger prints will come ready to be hung, such as gallery standouts or wraps which means you won’t need to add in the price of a frame as you will if you get just a typical print done.  Also if you get a print done is a more basic size, the frame will be easy to find and relatively cheaper then an odd size that you may have to get custom framed.  10x20 and 16x20 are pretty typical sizes that can be framed easily.

I get most of my wall prints done in black and white.  Its easier to know what they will look like and you’re not taking such a big chance on the colors coming out correctly.  Also they match any color of décor.  

Here are the examples hanging on my walls:

IMG_0038-5

  This is a 10x20 that hangs in our breakfast area.  Ignore the blind cord, just trying to keep the toddler from strangling himself during meal time.  This is just a regular print and I bought the frame from Hobby Lobby. The print came with a cardboard piece to keep it from getting bent so I took that and my photo up to Hobby Lobby and they framed it for me for free in a few minutes.  I ordered this print from WHCC which caters to professional photographers. Here is a place that does 10x20 prints for $5. Add a few bucks for shipping and $20 for framing, this print would probably cost you around $27.  It’s a decent size that looks large enough on the wall but still small enough that you don’t have to have a massive stair well to find a spot to hang it.  The color treatment was done with Creamy Chocolate B&W photo action available for free here.


IMG_0040-8

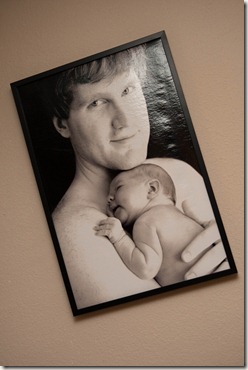
  This print is a 16x20 gallery standout.  It required no framing, just stick it up there on the wall.  Its printed on extremely light framing so you don’t have to worry about it ripping a nail out of your wall or anything.  I had this printed at WHCC.  Searching on the internet I couldn’t really find anything like it but I did find these gallery wraps here. They are also on sale. Looks like you could get this one printed, ready to hang for around $50 or $60.  Same photo treatment on this one.


IMG_0039-9

This is the big bad boy at our house.  And my only regret.  This monster is 16x30. It is printed on unstretched canvas and had to be custom framed.  When I originally ordered this print, I assumed it would come on canvas, stretched and ready to hang.  I spent $85 on the print and that was on sale.  I then had to get it custom framed at Michaels. I won’t go into the cost but it was astronomical. Unless you just desire unstretched canvas for some reason (I personally do not believe this looks any better then the other prints that I’ve had done), be ready to take a blow to your wallet when it comes to framing.  At least pick a size that you can frame yourself.  Photo tratment is the same again.


IMG_0041-7

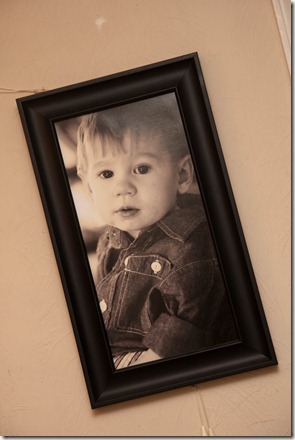
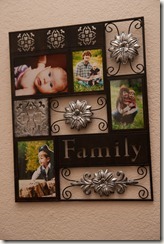
My mom bought me this frame for Christmas and we finally got around to filling it up. Never underestimate the power of small pictures in larger quantities put together. If you don’t want to devote 16x20 or wall real estate to one print, printout several 5x5’s and cover the same area.  You will still have a nice sized area covered in prints and the same eye catch but you’ll have more photos displayed.  Good for families with lots of kiddos too. I recommend going to Hobby Lobby or some other place that sells frames and seeing what is available before ordering your prints.  You don’t want to be surprised with a bunch of prints that you now have to get custom framed.  And like I said, see if the framers will frame it for you.  In my case they did and it didn’t cost me a penny!


This is the one print I’ve done in color. I tried to find this on my computer but I only have this on facebook or at least all that I can find.  I planned this photo out to match her room so I could get a large print done to hang.  This is another 16x20 gallery stand out.  The colors really are gorgeous and I am very happy with the way it turned out. Sometimes less editing is more when it comes to getting your colors to come out how you want them to. 


So there you have my decorating with photos in my own home.  I still have lots of wall to fill but I hate the thought of filling it all now with just one age range so I’m slowly filling it so we have some variety of photos. Plus we still have two kids to go! They are going to need some space as well.  I hope I inspired you to get some prints done and up on the wall.  It really is an investment you won’t regret.

Friday, January 28, 2011

Project 365- My week in photos!

So.. week 4 done! Almost an entire month of project 365.   It hasn’t been as hard as I thought.  I’m still not happy of all the times when I’m too lazy to get out of my camera and shoot.  One of my goals was to snap when we are out in public which I get stage fright or something.. so weird! Anyway, here’s my week in pictures:

IMG_0038-3

Mom got back fro Houston and came to visit

IMG_0043-3IMG_0052-3

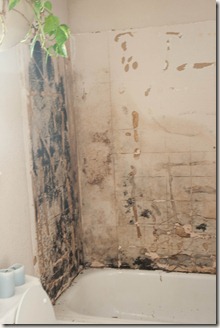
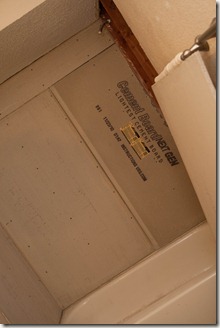
Tom started working on retiling our shower.  Once we took the fake plastic tile down, we found it had been glued to the wall and behind it the wall had just rotted out.  Tom put up a new wall for the tile.

IMG_0080-2

Round one of Valentine’s photos


IMG_0001-7

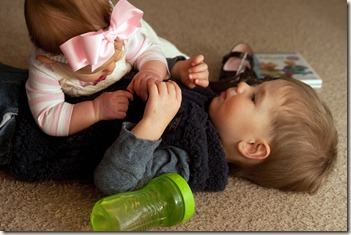
Sissy lets nothing stand between her and a sippy. Including her brother.


IMG_0112IMG_0081-3

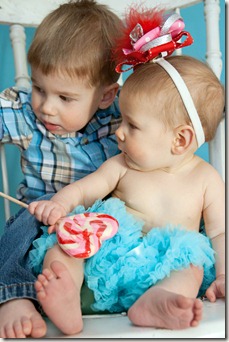
Valentine’s photos take 2. See I really do try to take pictures of Rett… just doesn’t work out.

IMG_0175

Playing outside. It was really warm yesterday so we actually got to go outside for awhile.


So that was my week!

Here is my layout from last week:

Wednesday, January 26, 2011

WAHM Wednesday- Spotlight on Bree & Lia Boutique!

Today’s spotlight is on a mom who has a daughter Evie’s age and makes absolutely adorable crocheted hats!  Perfect for photography, baby showers or just to get some attention for your perfect cherub.


Name: Holly
Location: Duluth, MN
Business Type: Handmade crochet beanie hats & accessories
Kiddos Names/ages: Aubrey (almost 4) & Julia (almost 8 months)
Why did you decide to start a WAHM buisness? I learned how to crochet from my Grandma when I was younger so I knew the basics of crochet before I even thought of selling my work. I started making beanies for my daughters and for friend's kids then decided one day to make an Etsy store to see if any of my items would sell. I started off slow - adding new items here and there. Now, about 9 months later I've created a growing business I love to work on every day!

What if your most favorite part of having your own business? I love hearing feedback from families who've bought from me. It's always nice to hear that others enjoy your product and that their kids are happy and excited to wear it! I also love getting 'Fan Photos' from others wearing Bree & Lia!

What is your least favorite? I honestly don't have a 'least favorite' thing about it - I sometimes get a little overwhelmed with orders around big holidays such as Christmas or Halloween but it's not a bad thing to be busy!
How long have you had your business? How long have you done your craft? I've been crocheting since I was younger and I've been making beanies with Bree & Lia Boutique since April 2010.
What has having your own business added to your life? It's added a lot of fun! I get to fall asleep at night thinking of fun new ideas I can work on the next day! :)
What makes your business special? I think my items are special because I have a nice mixture of things for any occasion. Whether a beanie is to be given to a new Mommy for their newborn to wear coming home from the hospital, a beanie to wear at a Baby's First Football game, a Trip to Disney World, or a beanie to be used as a Halloween costume or Photo Prop - everyone can enjoy them! 

Here are some of my favs from Holly:


You can find her facebook fan page here. If you like her, tell her Laura’s Daily Madness sent yah! She’s having a referral contest right now!  Also her Etsy shop is here.

And Holly has offered to give away a 15% discount off one item to her store! Just comment on what hat you would buy! I’ll be back Friday to announce a winner. PLEASE leave your e mail in your comment or check back on Friday for how to contact me!

Tuesday, January 25, 2011

So ready for spring… and a give away x 3!

Is anyone else sick of the cold and the snow and the blah?  I definitely am.  I’m ready to get outside and watch Rett play, get our garden started and soak up some sun.  Last night we were going over our Hawaii trip plans for this summer and to say I’m looking forward to it is an understatement.  And before you know it, spring is gonna be here!

Did you know that a lot of your spring garden needs to be started indoors during February and March? Thinking about planting seeds this early when its so gross out normally doesn’t cross your mind but this enables them to be strong enough to have a good leg up for your outdoor planting.  So don’t think I’m crazy for posting some farm ideas. I always did farm in conjunction to seeds in my classroom, the two just go together!

Vocab-  Vocab doesn’t have to be flashcards.  It can be a list printed up as a reminder to you for the words you’d like your child to identify, understand or use depending on age and ability.  Here are some ideas: farm animals (cow, horse, pig, etc), barn, shed, tractor, combine, seed, sprout, plant, leaf, crop, hay, harvest, plant, germinate.  Not every word is going to be suitable for every child. Choose words on your child’s level and add to the list as you read through your books and find new words to work on.

Books- Books are an easy way to teach your information and vocab!  If your child isn’t old enough to listen to the entire story or informational text, use the pictures and discuss what’s going on. 

Books for toddlers:


Factual books:


Plant Activities:

Collect small containers such as empty yogurt containers, baby food jars or empty milk cartons. Have your child help you fill the containers with dirt.  Choose 3-4 different kinds of vegetables or other seeds and label the containers for what will be planted in them.  Make a plant journal and note the day you planted the seeds.  Another idea is to plant beans in zip lock baggies.  Moisten a paper towel (do not soak.. it will rot the seeds, I know from experience), place a few bean seeds inside and seal in a zip lock baggie.  Beans sprout within a few days and will need to be planted in soil within a week or two.

Talk to your child about the different sizes and shapes of the seeds.  Does this have anything to do with how long it takes them to sprout (check the back of the seed packet for info), the size of the plant or the size of the fruit they produce?  

Water seeds and place in a sunny area.  Continue noting things in your journal such as when each plant sprouted, when they put on their second set of leaves, when you planted them outdoors.  Your child can draw the different plant sprouts, graph the days it took to sprout and help you with watering and transplanting.

Animal Activities:

Make paper plate animal masks.

Collect a large box (you can call best buy or another store that sells refrigerators and see if you can get a box), cut out doors/windows and have your child help you paint their new barn. 

Read the little red hen and make your own bread at home!

Make home made butter. You can google the directions but this is something I do every year and the kids love it.  Good to make while waiting for your bread to bake.

Draw pigs on paper, color and cut out.  Mix up some instant chocolate pudding and finger paint a fun mud paradise for your pigs to play.  Eat the leftovers.

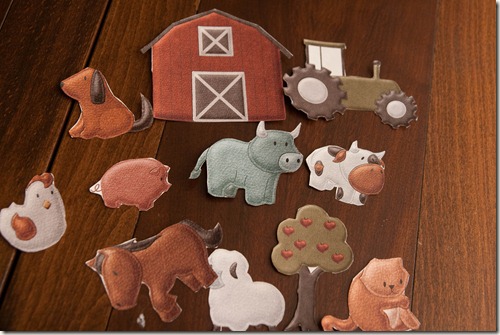
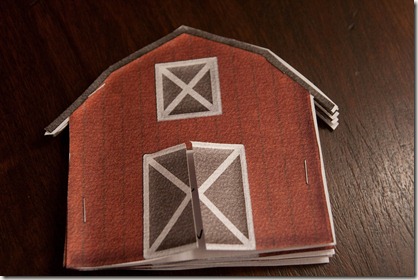
Ramona released this kit today:

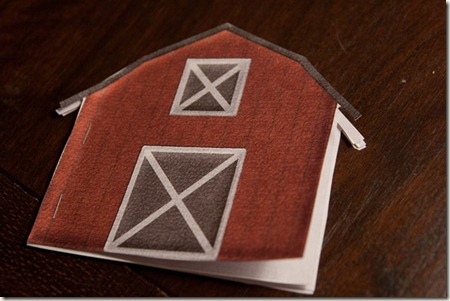
And as soon as I saw it, my teacher brain started working overtime on ideas to use with my son.  Here are a few I came up with:
IMG_0001-6

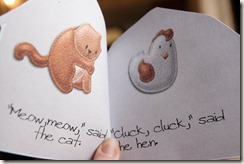
Peek a boo book.  Open the barn to read the simple text.
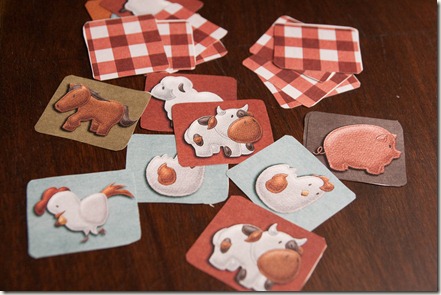
Animal Match Ups Preview

Animal match up.  A simple memory game.
 

Easyreaderexample2EasyReaderexample

An easy reader with animal sounds.


IMG_0008-8

Puppets for gluing to popsicle sticks or attaching magnets to for fridge fun or use a cookie sheet to keep a little one busy in the car.

I put all these together along with templates for you to make your own and Ramona put them in this bundle: (image linked)


It was so fun coming up with ideas and putting the templates together. Hopefully I can do this with some other kits as well.  Ramona made the fridge puppets for her son, Noah and said he played with them for an hour!  Can’t beat that for some cheap rainy day entertainment.


So this week I’m doing a give away! Ok I’m doing 3 give aways! I’m going to give away the two easy readers I printed and put together, my animal match up game and my animal puppets.  You can earn three entries: comment below with what you would do with your freebies for 1, subscribe to my blog above and comment that you did that as 2, follow my blog for #3.   Good luck! I’ll be back next Tuesday with a winner!

Monday, January 24, 2011

Valentine’s Photo Ideas

Its getting to be just about that time! Its funny how the holidays sneak up on us and really to have photos for cards to be ordered, you will need to get your Valentine's pics done within the next few weeks! 
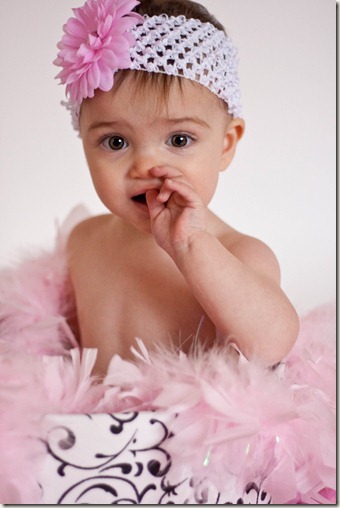
If hiring a photographer or going to a commercial studio really isn't in the budget right now, here are a few tips to get some great photos of your kids yourself. 


1. The background
 

The background of your photo really sets the stage.  A plain background puts more focus on your child while a pattern background can add some interest or fun!  For Valentine's you might do a baby pink or blue sheet pinned to the wall.  I myself am about to go to Target to snag one of their fun Valentine's themed shower curtains.  A simple white or grey will also photograph beautifully!

IMG_0016


2. The Props

This is such a great holiday to use some props! Some cheap and fun props for boys and girls can be found in the $1 bin at Target.  Some of my favorites are suckers, love bug antennae or other cute hats.  I bought this hat box at Target for $20 and the boa at Hobby Lobby for $3.  Check the storage areas of your stores as well as your craft stores for cute containers and accessories.


IMG_0303


3. The Poses

Using containers, chairs, benches, buckets or whatever else you may have around your house, set up your little studio, bring in your child and see what you can get.  Having some sound makers ready to attract attention can help as well as wearing hats or other fun things on your own head.  Suckers keep kids busy while adding a color pop to your photos.  The most important thing is shoot, shoot, shoot!  The more pictures you take, the more likely you are to get a good one.  Shoot at leave 5 photos of each prop/pose. Change hats, props, backgrounds or chairs to get more looks.


IMG_0059-2 copy


Here are some photos I did of Evie today:


IMG_0063-2 copy 2


IMG_0039-7 copy 2


IMG_0087-2

I bought the shower curtain at Target like I said I was going to. It was $12. They also have one of the same color scheme but in stripes.  I might go get that one too. Pretty nice price for a background and it would be nice for basic, bright shots anyway.  The rug I also got at Target. It was on sale for 18.50 and I plan on using it in Evie’s room after pictures are done.  My bow if from The Picket Fence. If you happen to buy one of her awesome bows, mention my name cause I get one FOR FREE.  I love their bows.. seriously they have an auction every Wednesday and I NEED to stop attending because I’ve bought something every week for.. um.. a long time. The pettiskirt is from Braylin’s Boutique.


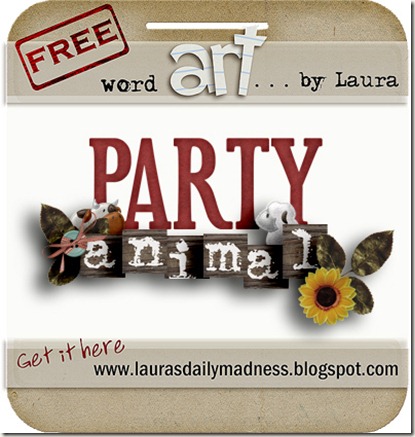
And for my scrapper friends, here is your freebie for today! It matches up with Ramona’s Farm Country releasing tomorrow!


partyanimalpre


You can pick it up here

Friday, January 21, 2011

P365- My week in pictures!

So my goal for 365 if to get my camera in my hands everyday.  This may not mean just one picture or even just one time. It seems that as I become consciously aware of wanting to take photos everyday, I actually end up taking photos as several times of several things.  Which basically means I’m going to have a thousand scrapbook pages for this year. Yikes. So far for January, I have taken 300 photos. WOW!  If this is how every month goes.. I’m just starting to get worried.  Anyway, here is my week in pictures!


Saturday

IMG_0019-2 copy 2

Lunch! Yum!

Sunday

IMG_0014-3 copy 2

The way we’re handling being asked to pick up toys right now.


Monday

IMG_0024-6 copybw

when did he get so big?


Tuesday

IMG_0001-4

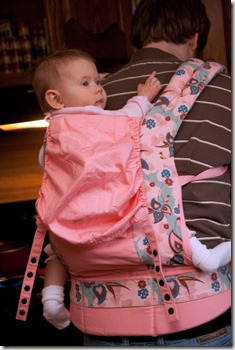
Super dad! Ok maybe even a normal dad would wear baby while making dinner but it takes a super dad to wear a pink carrier. 

IMG_0069-3

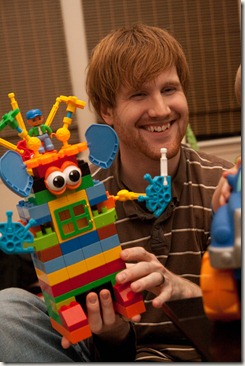
I have to share this one too. Most of the photos seem to gravitate between the two kids.  I was pretty impressed with this robot Tom spent an hour making. It only took Rett five minutes the next morning to destroy it. Robotcha is a FRIENDLY robot!

Wednesday

IMG_0092 copy

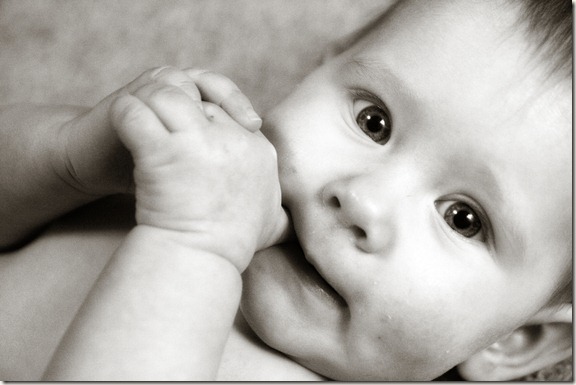
Our beautiful Evie right before bath time. Its funny how the little moments can turn into art whenever you watch for it.


Thursday

IMG_0017-6

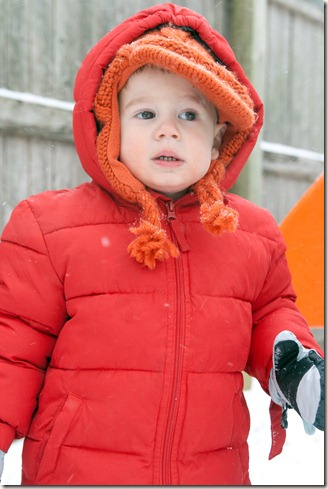
Playing in the 3 or 4 inches of snow we got over the night.  Notice the eye aversion from the camera. 


Here is my layout from last week:

Made using Ramona the Pest’s Friends Forever.